
Recently upgraded GPU for an old machine and wanted to get the most out of the hardware, specially for an emulator running Android apps.
There are number of Intel based guides out there but these configurations are particular to the hardware that my machine is running.
Your numbers and results can vary to a great extent.
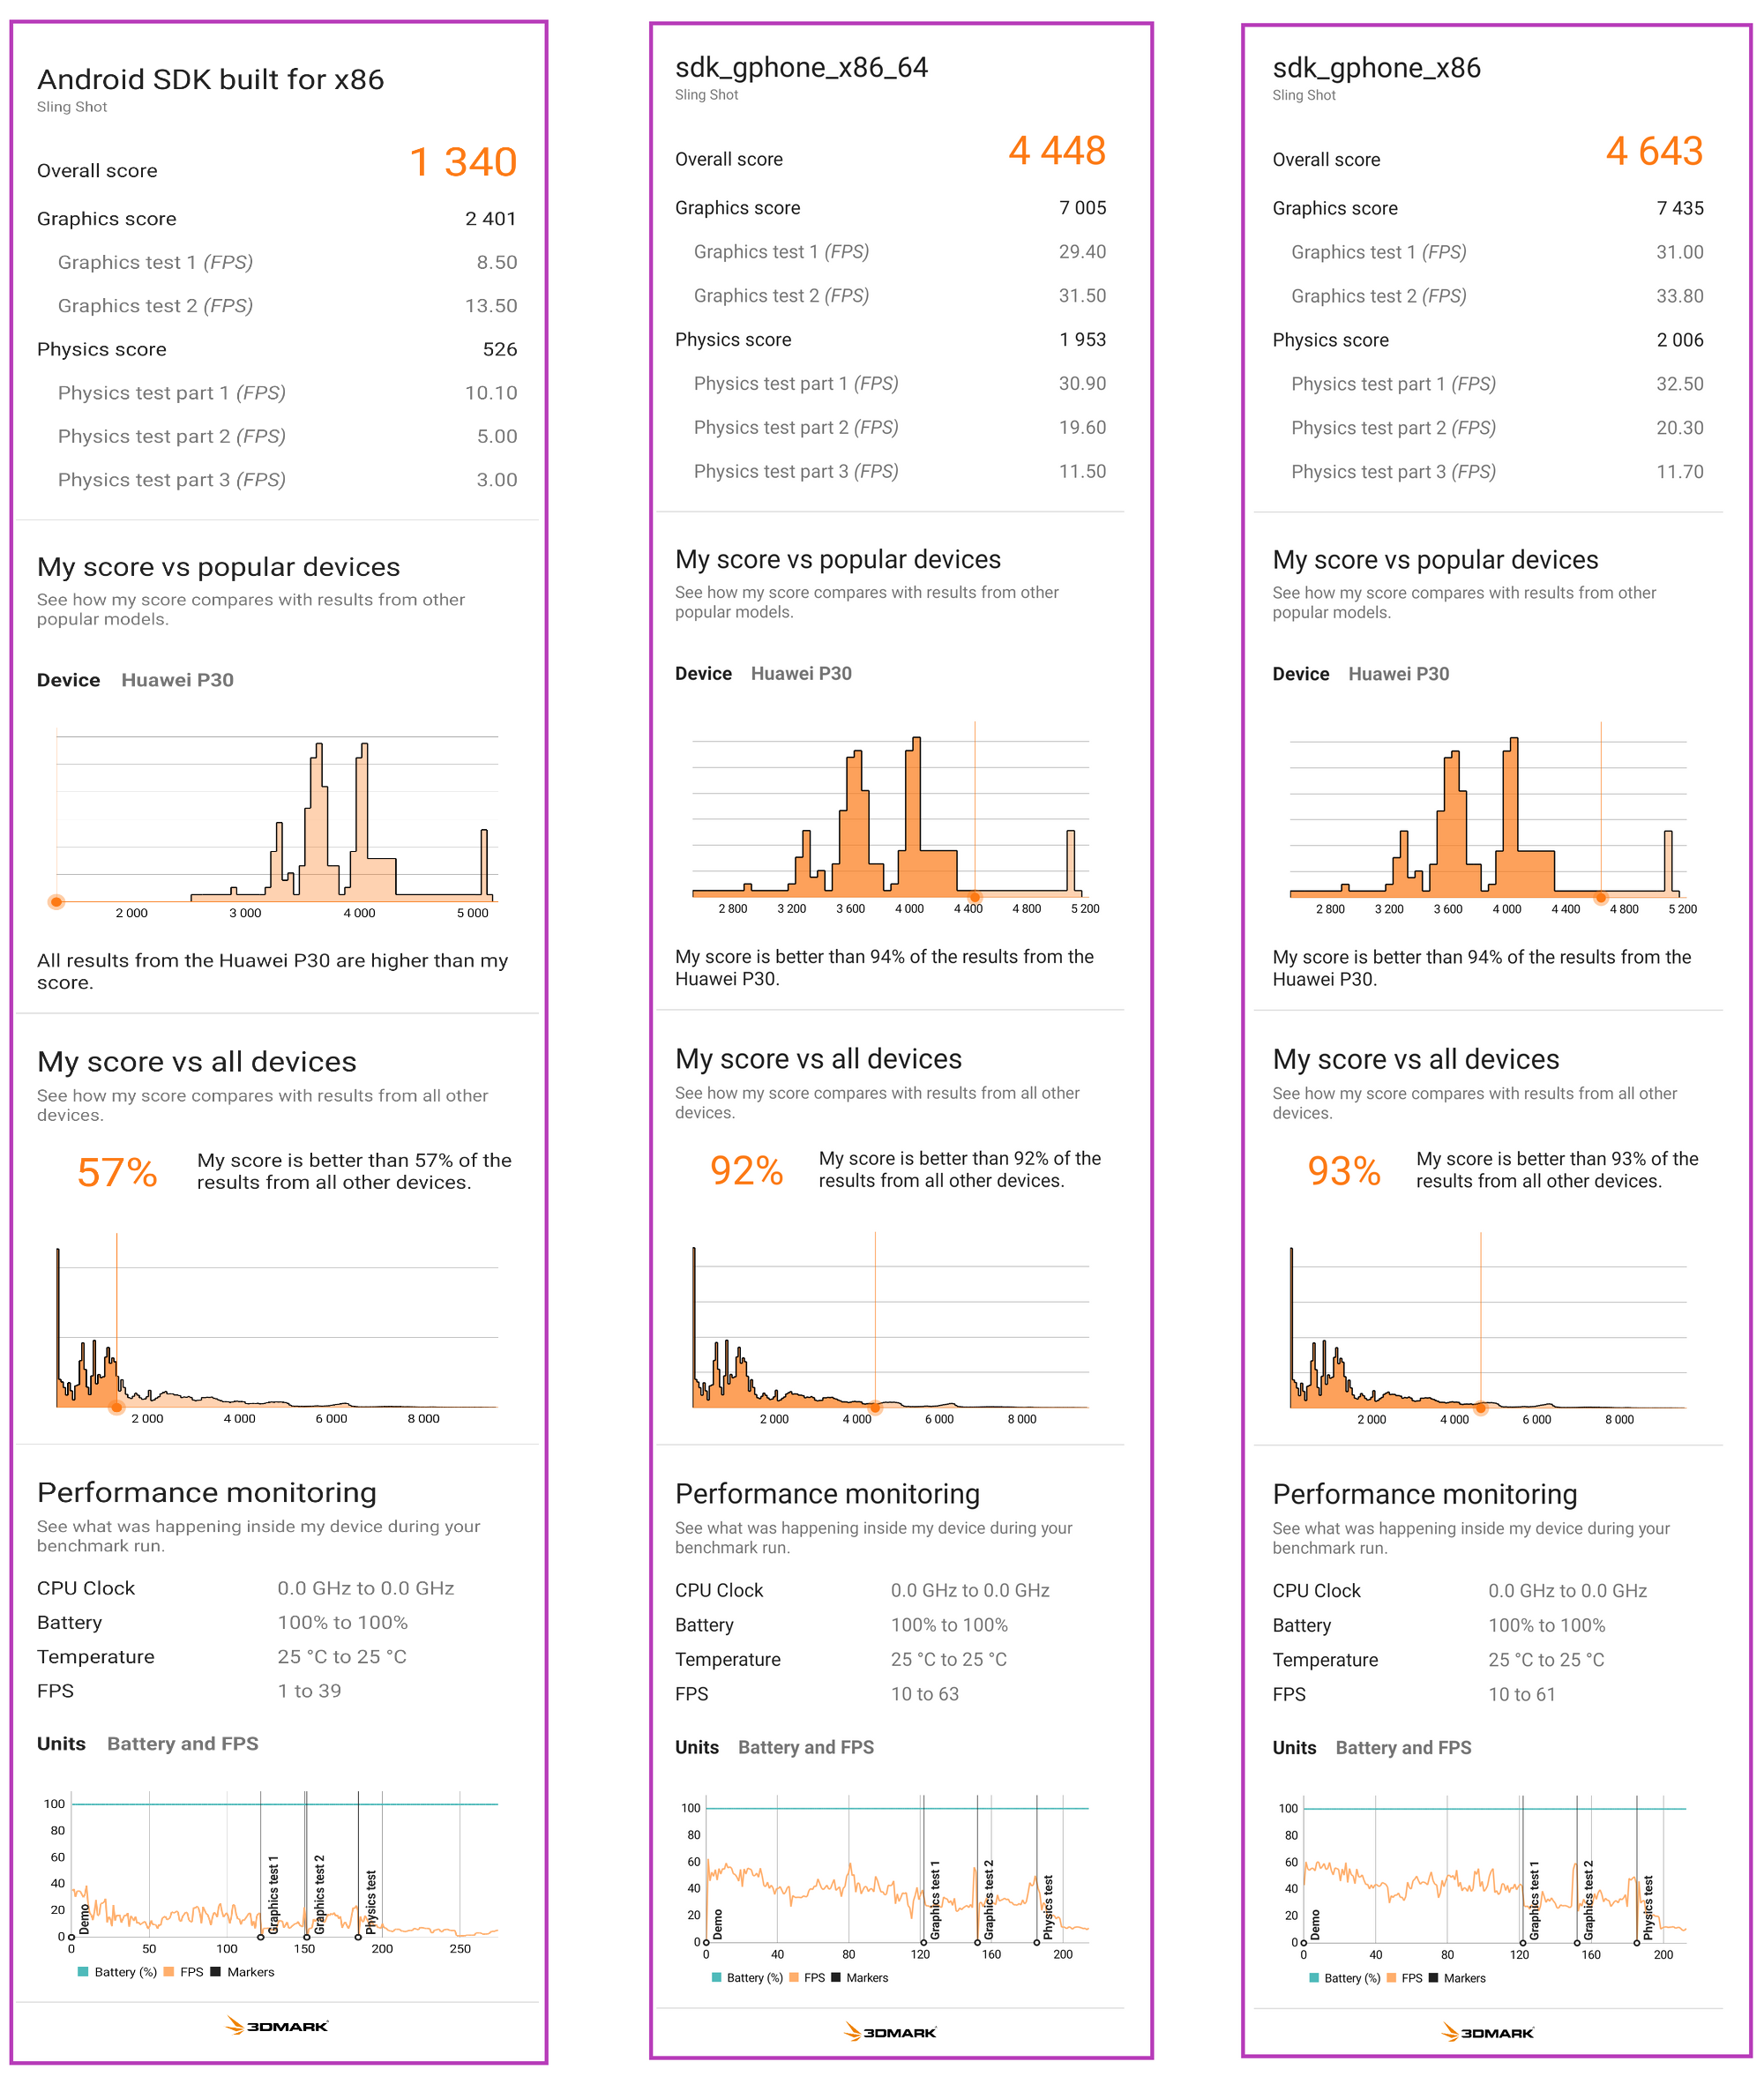
Below on the left is an out of box 3D Mark test result for an X86 based AVD, compared to the right end, which is after all configurations X86 based AVD. Middle numbers are for an X86_64 based AVD, with same configuration as the right.
System:
CPU - AMD A10-7850K Radeon R7, 12 Compute Cores 4C+8G
GPU - Radeon RX 580 Series 8 GB
OS - Windows 10 Pro with Android Studio
Make sure GPU drivers are up to date.
Step 1 - CPU Acceleration:
- Enable Hyper-V for CPU - Link
Hyper-V allows us to take advantage of the hardware acceleration of CPU
Android studio will try to install intel HAXM and fail, but don't worry HAXM only work for Intel CPU's.
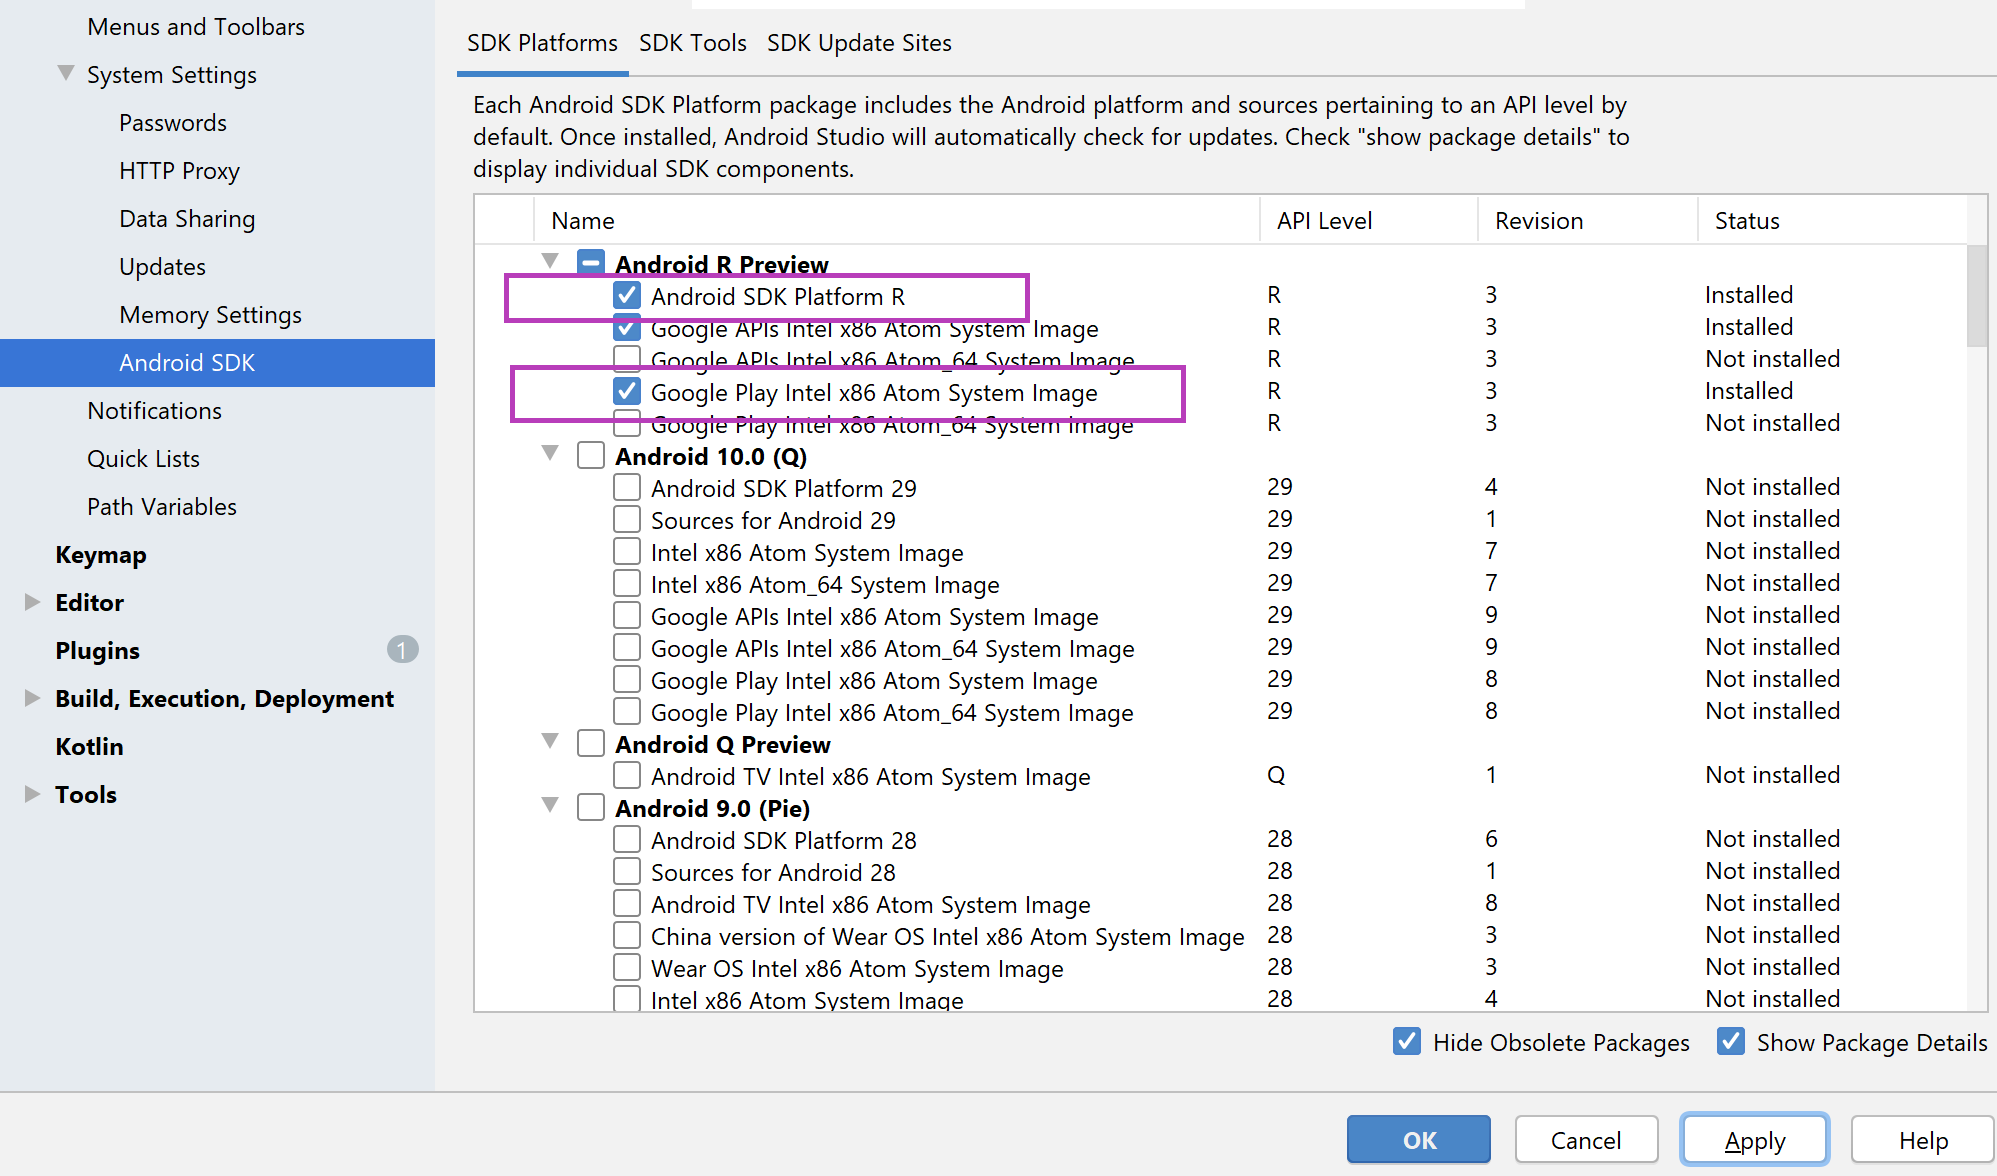
Step 2 - SDK and tools :
- We have to use an X86 based AVD's, as they are the fastest - Official doc
Note: You don't need to run a ARM AVD anymore for running ARM apps - More - So in SDK manager install any SDK and X86 System Image.
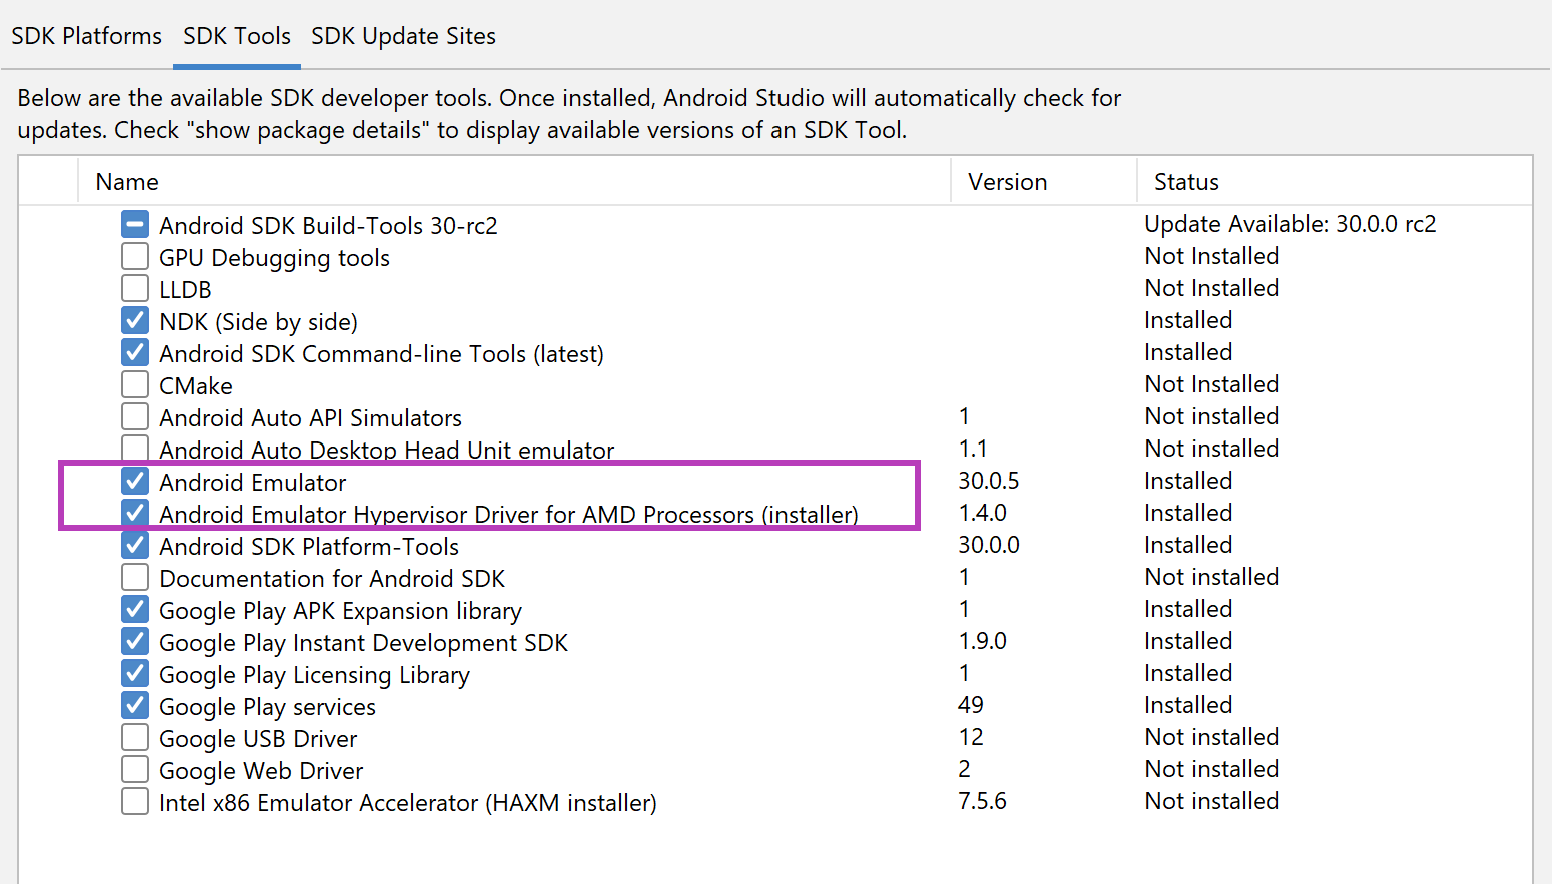
- Make sure to have Android Emulator and Hypervisor Driver from SDK tools.
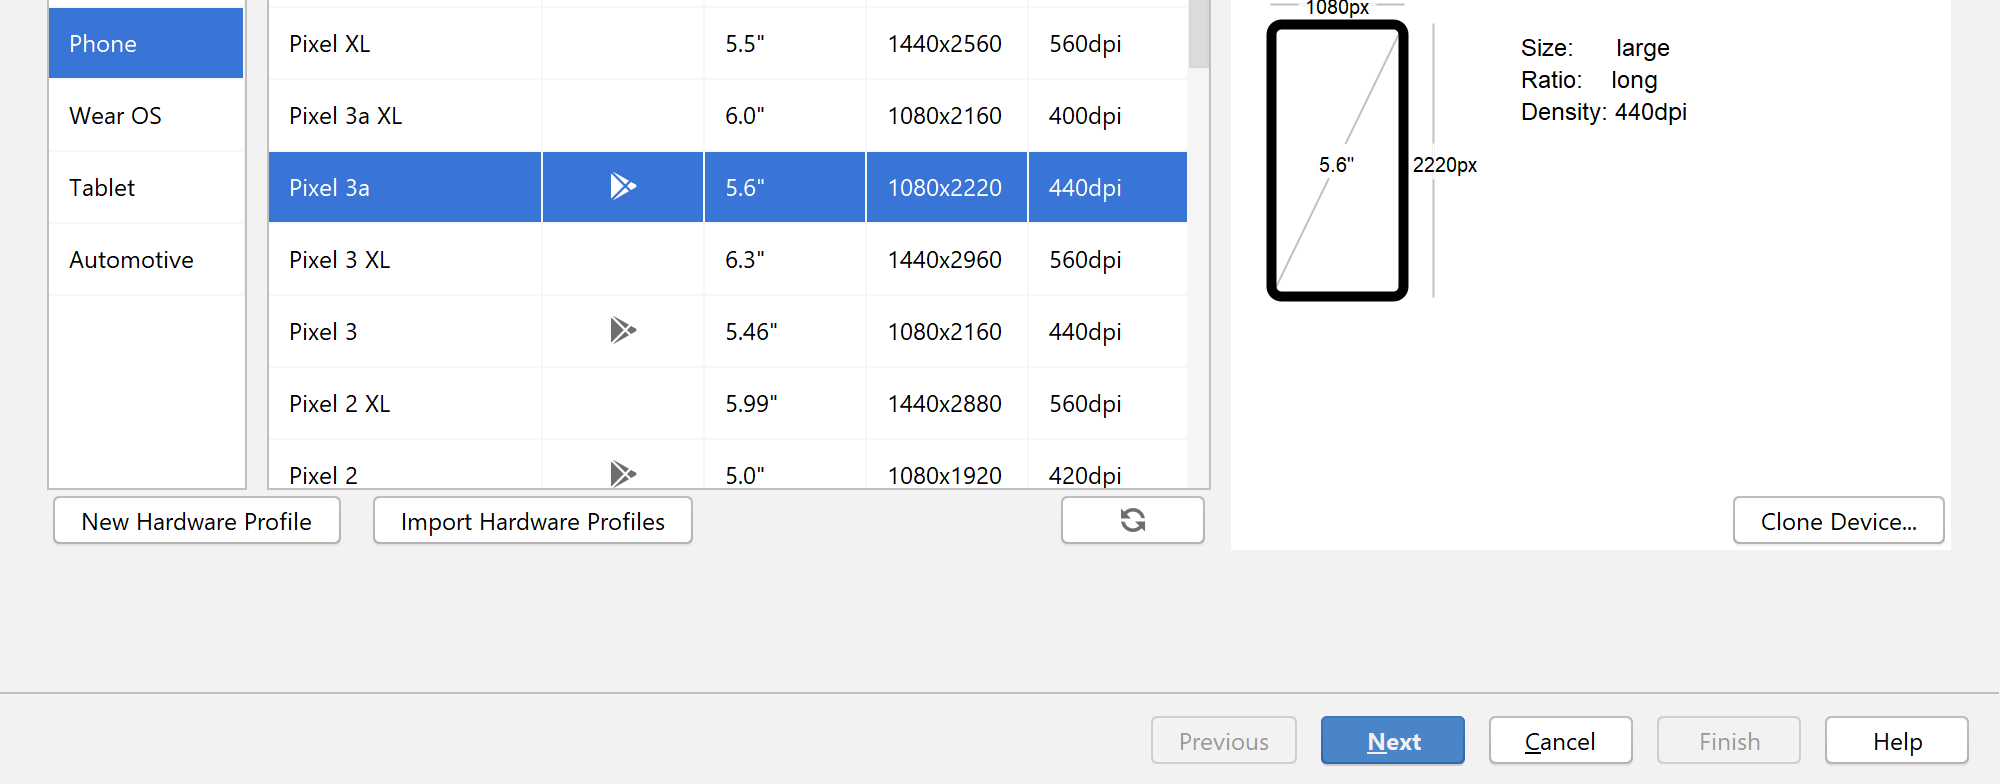
Step 3 - Create an Android Virtual Device (AVD):
- Select an hardware profile, Pixel 3a (Latest Google Play profile)
Note : Google Play profiles are locked and production ready builds.
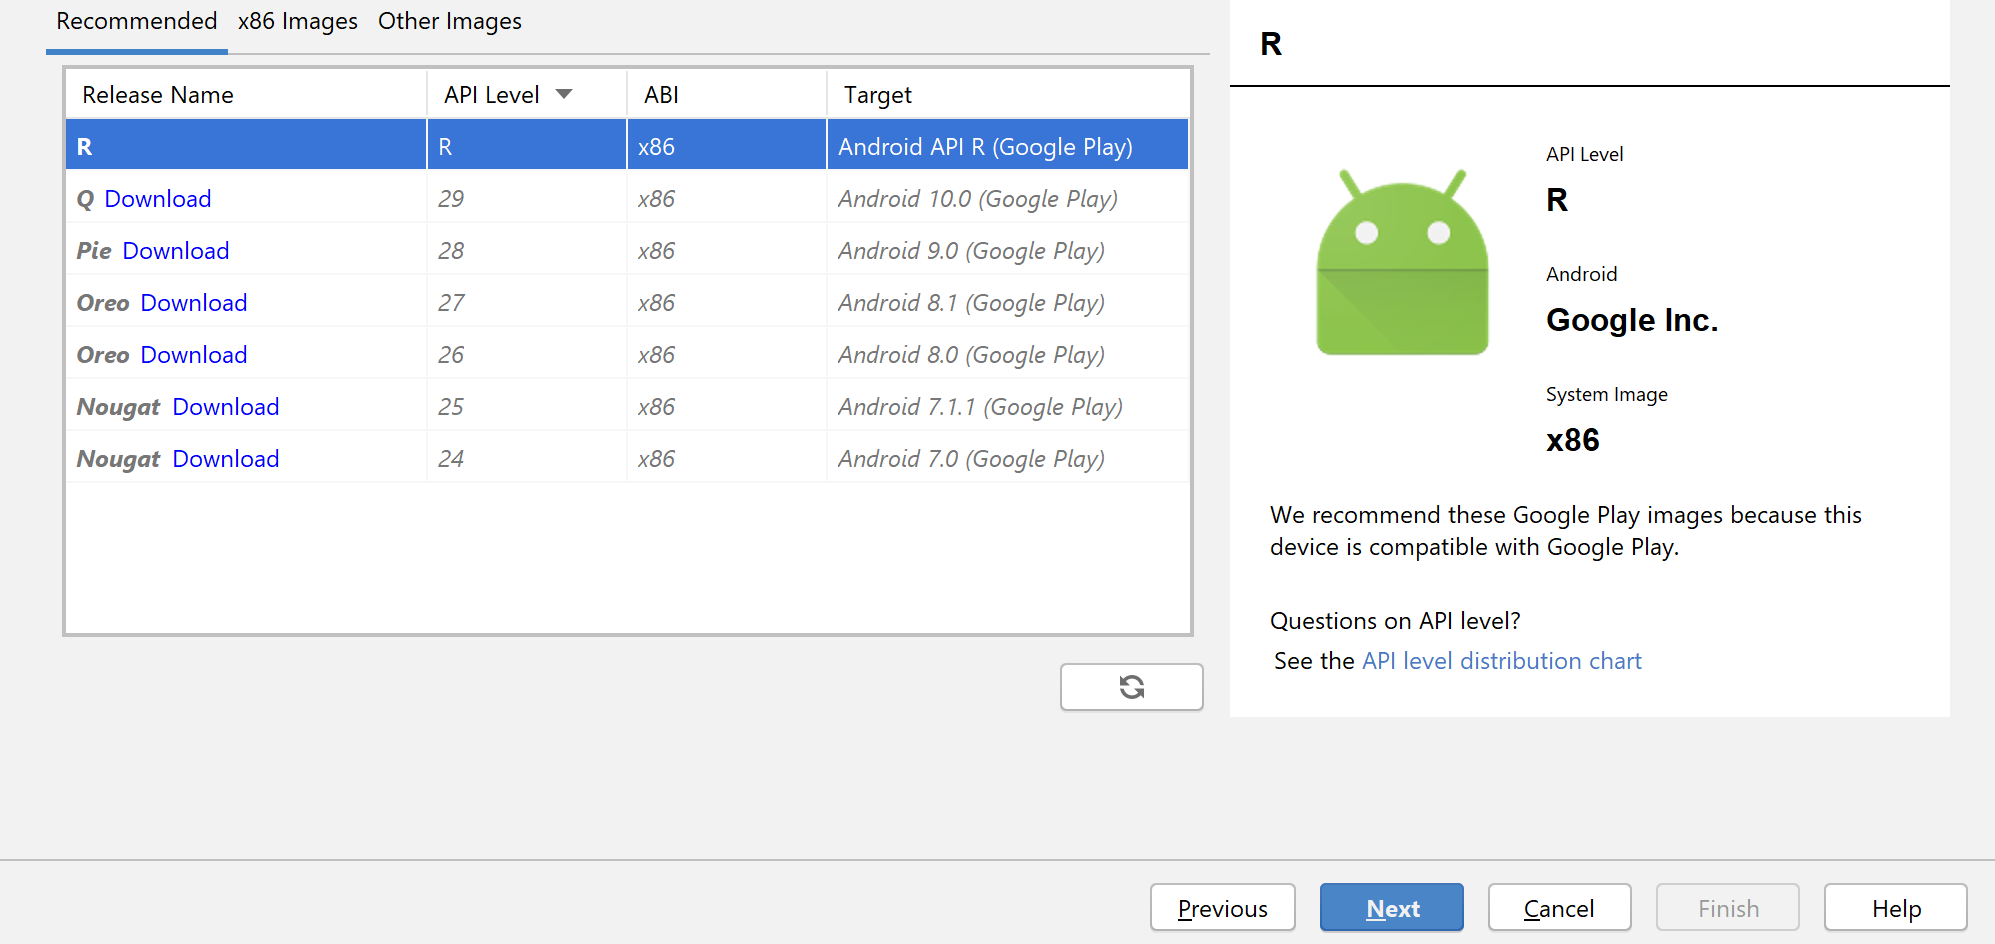
- Next select the Recommended SDK, API level R, ABI x86, with Google Play
Note: You can only use Play Store hardware profiles with Google Play system images
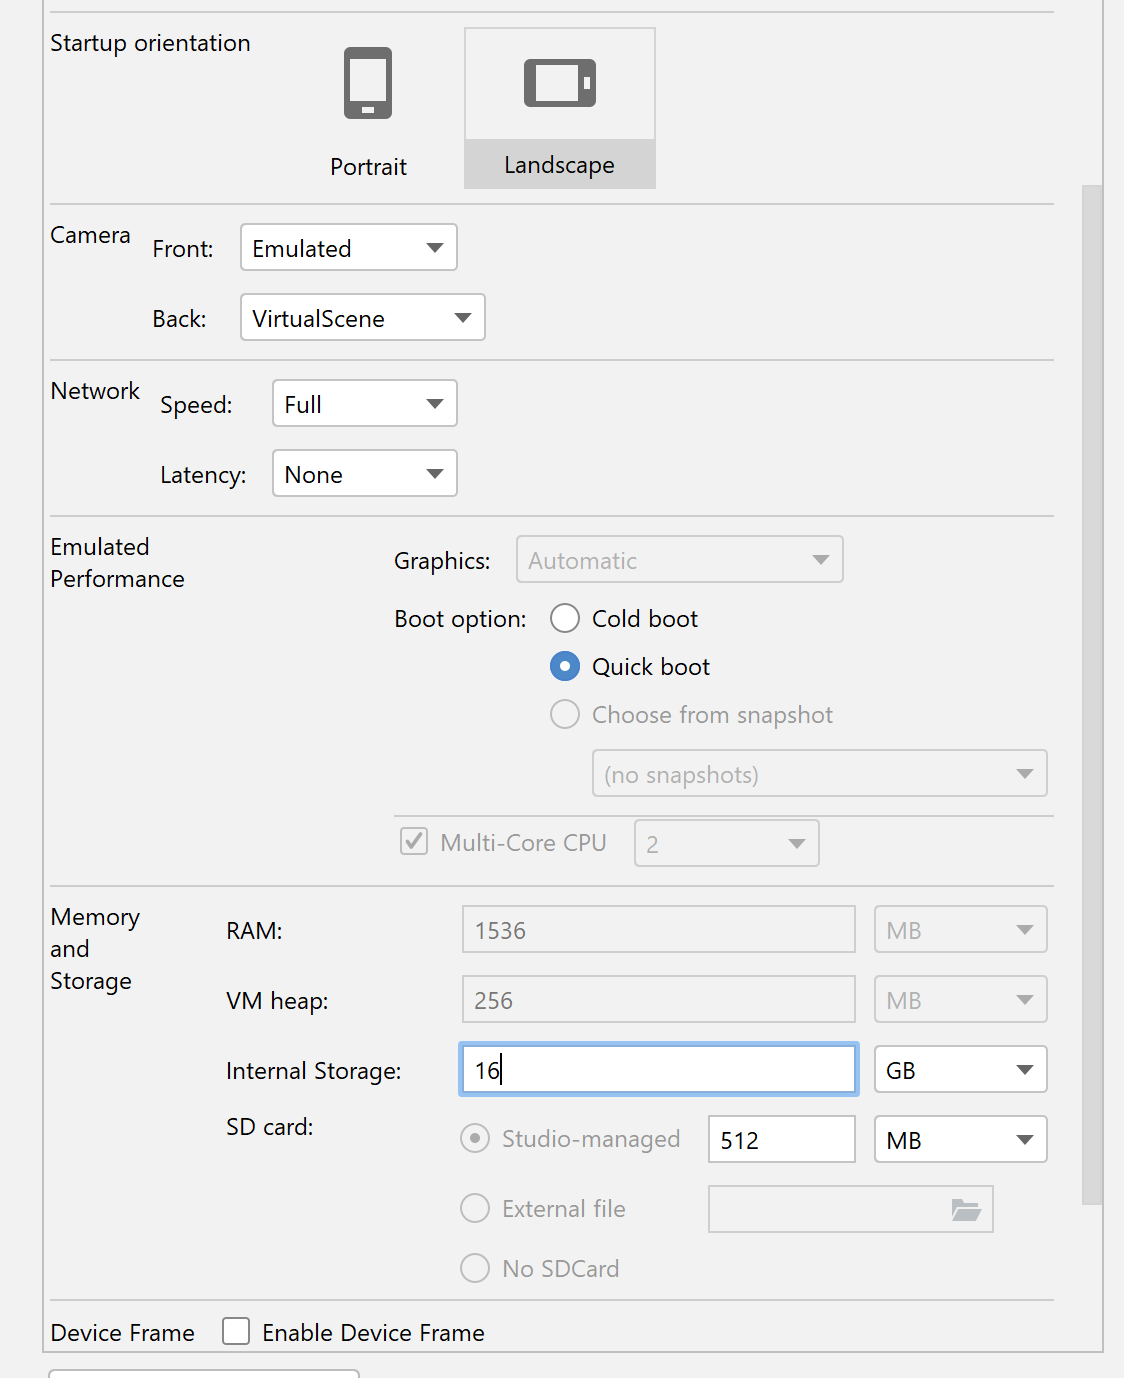
- Then in next step just click Finish to create AVD.
Note: Most of the settings are grayed out for Google Play based configurations, for non Google Play images, these settings become available on UI.
These settings can be edited later, once the AVD is created.
STEP 4 - Edit AVD configuration manually
- Android emulator is based on QEMU - Link
- Navigate to "C:\Users\<XXXX>\.android\avd\PerfPixel86.avd\"
Where XXXX - your username and PerfPixel86.avd is the name - Open "config.ini" in a text edit and change the values as below
- Size of the Disk, you want for emulator, make sure you have disk space
disk.dataPartition.size=16G
- No of CPU cores for emulator, **Beware , depends on host CPU
hw.cpu.ncore=4
- Make sure you have enough RAM on the system
X86 based emulators cannot go above 4 GB, even if it is set to 8 GB below
If you want more RAM, switch to x86_64 based Image.
hw.ramSize=8192
vm.heapSize=4096
- Change gpu mode to host to use your host video card, RX580 in our case
hw.gpu.enabled=yes
hw.gpu.mode=host

Make sure to have the hypervisor setting in advance features for CPU - Link
Step 5 - Runtime settings
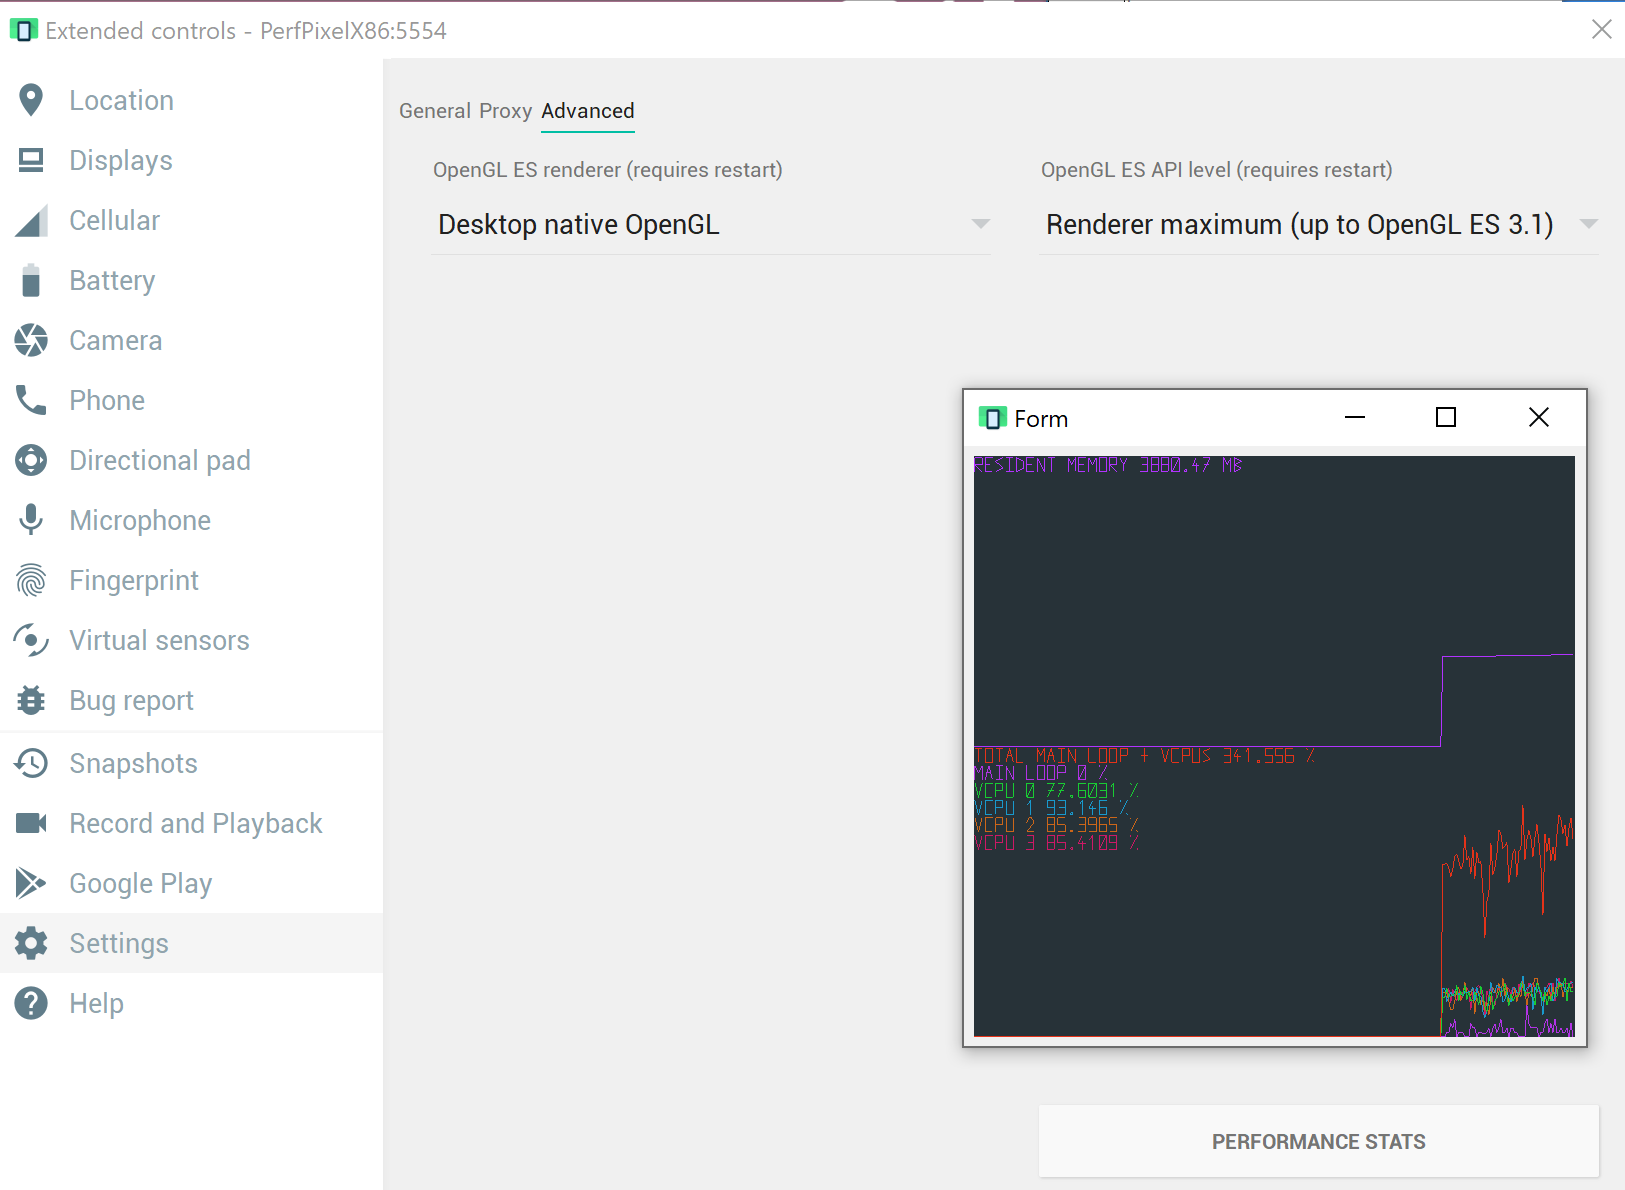
- Start the emulator and in "setting > Advanced" set it to Desktop native OpenGL and OpenGL ES 3.1, make sure to restart the AVD.
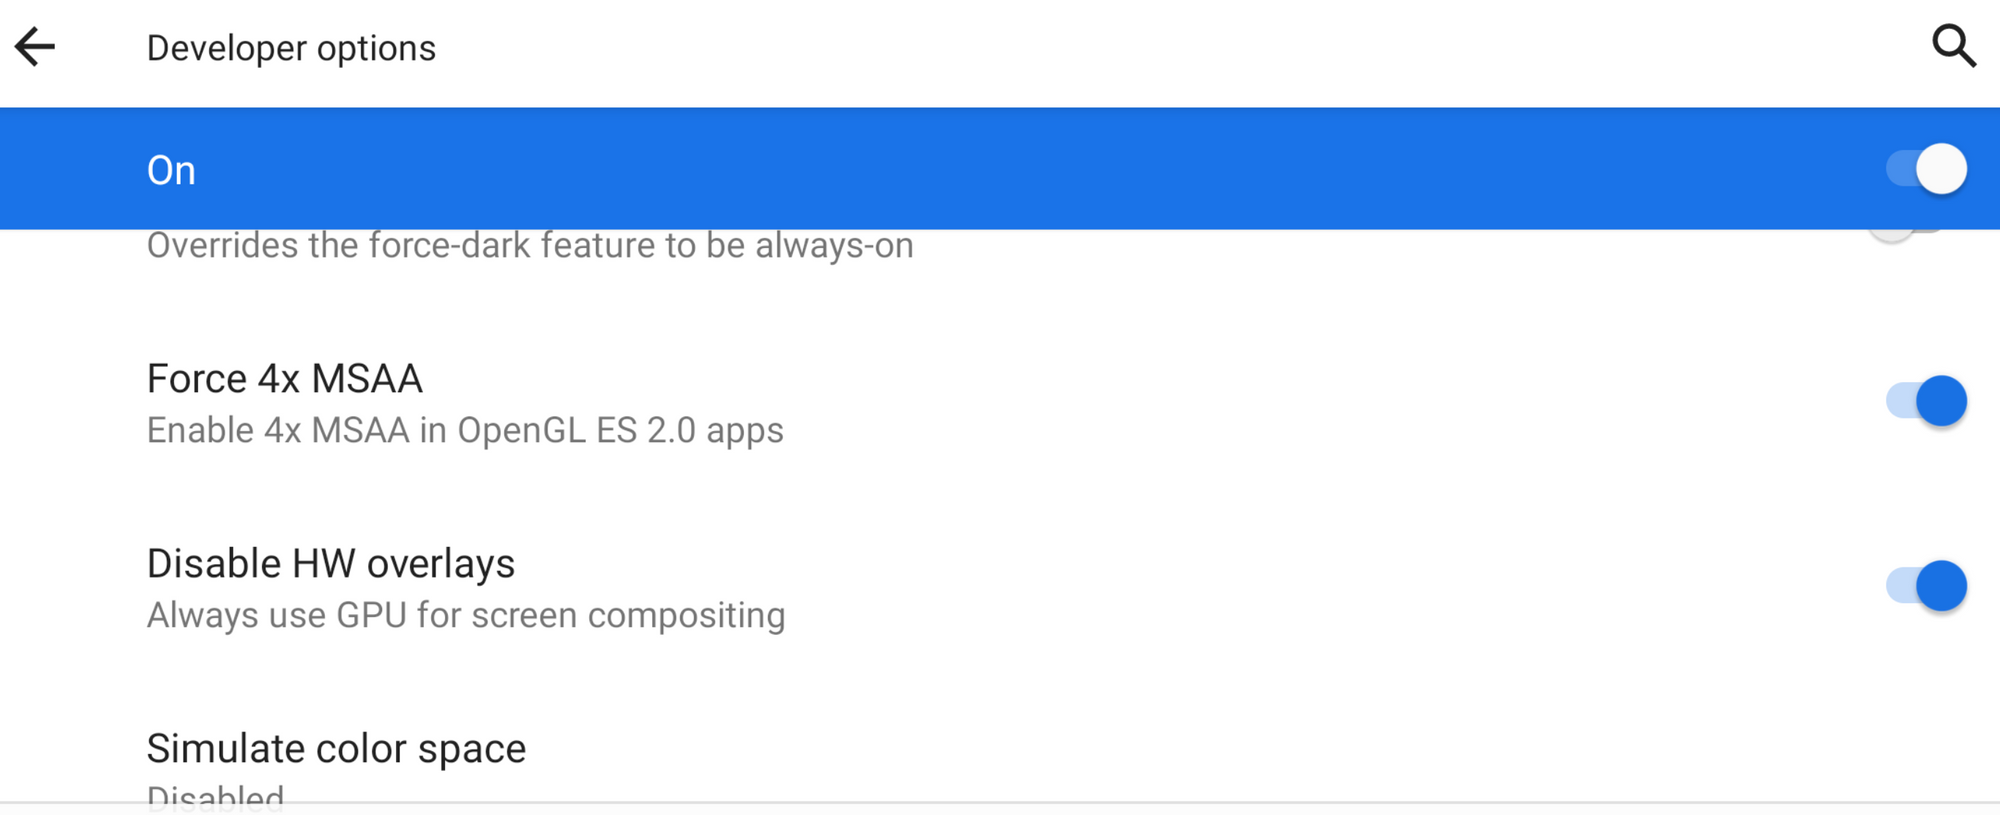
- Inside Android, enable the developer settings, by tapping build number 7 times
- Set Force 4x MSAA and Disable HW overlays in Developer options
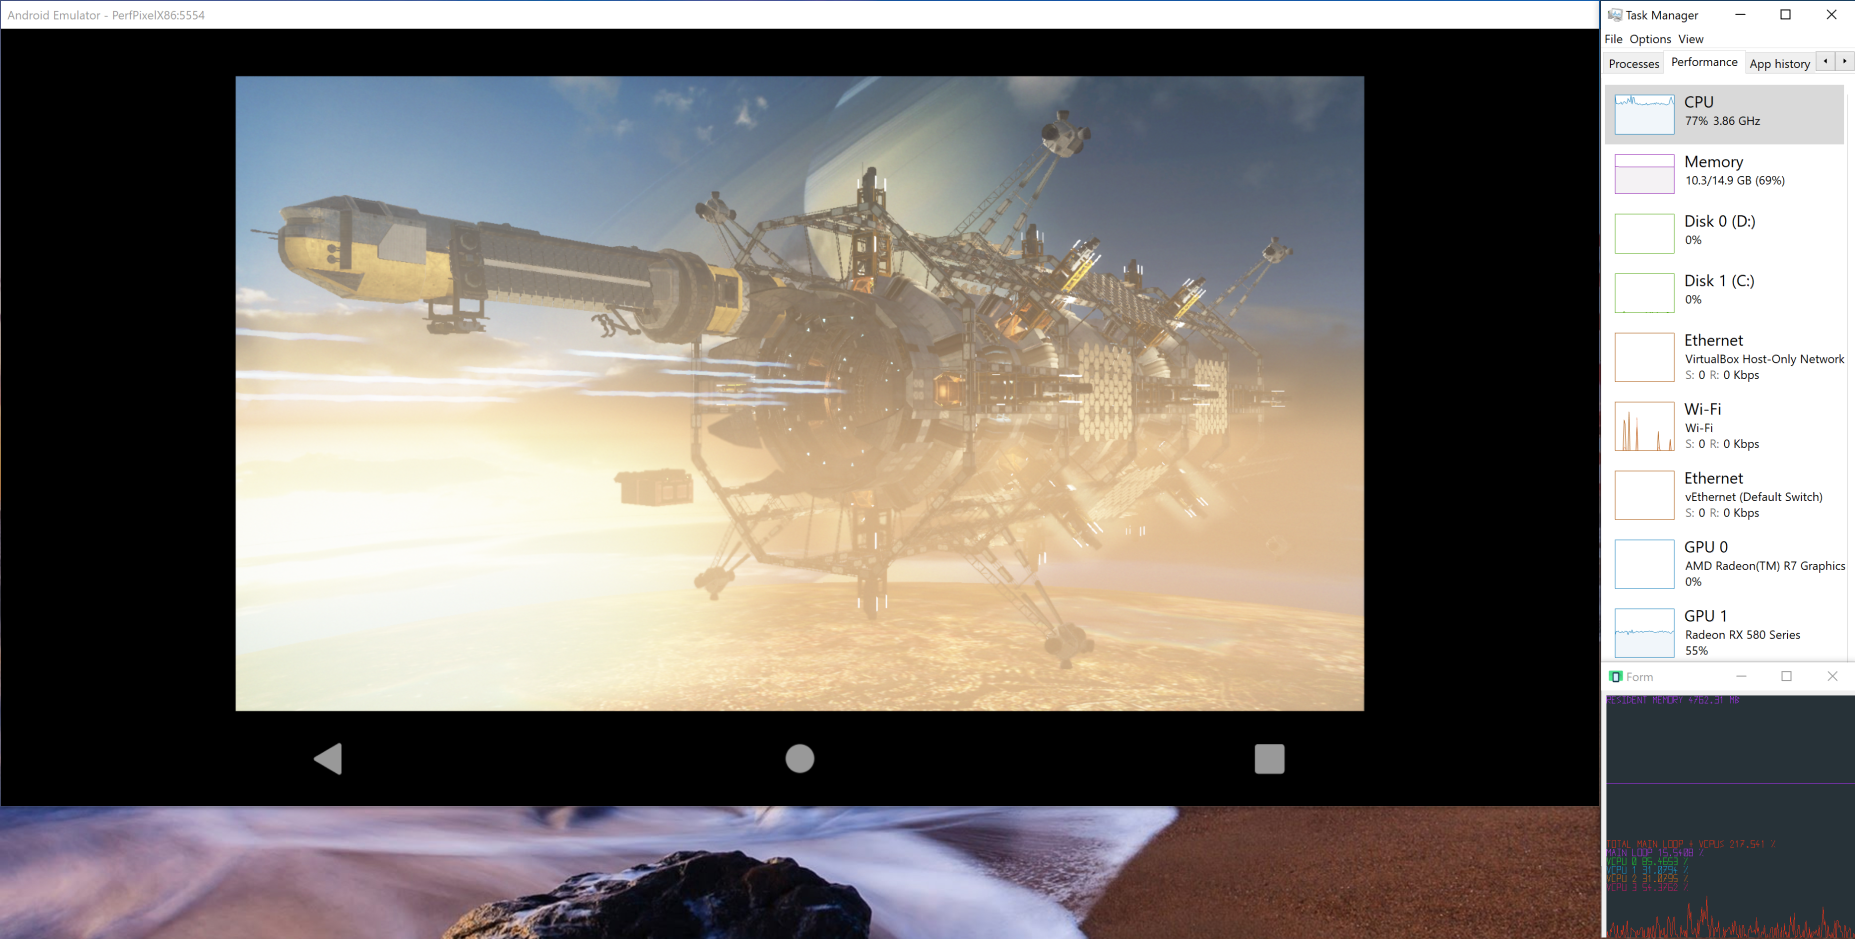
The configurations are now complete, Below is the screenshot of actual 3Dmark test
Links :
- https://docs.microsoft.com/en-us/xamarin/android/get-started/installation/android-emulator/hardware-acceleration?pivots=windows
- https://developer.android.com/studio/run/emulator-acceleration
- https://developer.android.com/studio/command-line/avdmanager
- https://developer.android.com/studio/releases/emulator